
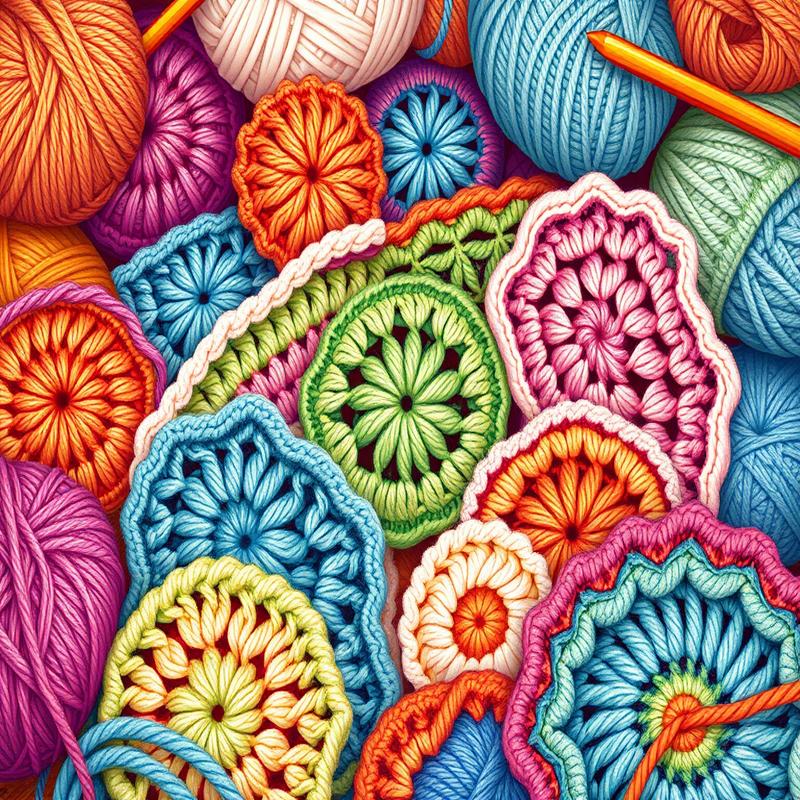
crocheting stitches
Crocheting stitches are the foundation of every beautiful crochet project you see.
Whether you’re a beginner or an experienced crocheter, understanding these stitches is key to creating everything from cozy sweaters to delicate doilies.
When I started crocheting, I found that mastering various crochet stitches opened up a whole new world of creativity.
Each stitch brings its own unique texture and style to your work, making it so much fun to experiment and create.
If you’re feeling a bit lost, don’t worry. You can check out our easy-to-follow basic crochet stitches to help you get started.
And if you’re ready to take it a step further, exploring crochet stitch patterns will elevate your projects to the next level.
Plus, knowing how to count your stitches is essential for keeping your work neat and tidy.
So grab your yarn and hook, and let’s dive into the wonderful world of crochet stitches together!
“`html
“`
Understanding the Basics of Crocheting Stitches
Crocheting is a versatile craft that allows individuals to create a variety of textures and patterns using simple stitches.
To understand crocheting, it’s essential to familiarize yourself with the fundamental stitches that form the foundation of most crochet projects.
The primary stitches include the chain stitch, slip stitch, single crochet, half double crochet, and double crochet.
Basic Stitches Overview
- Chain Stitch (ch): The fundamental stitch that starts every crochet project.
- Slip Stitch (sl st): Used to join stitches, create a seamless look, or move between stitches.
- Single Crochet (sc): A tight, dense stitch ideal for amigurumi and projects needing structure.
- Half Double Crochet (hdc): Slightly taller than single crochet but shorter than double crochet, offering a balanced texture.
- Double Crochet (dc): A taller stitch that creates an airy fabric perfect for lace and blankets.
Each stitch has a unique structure and tension that results in different appearances in the final product.
Understanding these stitches is crucial for beginners seeking to explore crochet’s vast capabilities.
How Stitches Influence Projects
The choice of stitch affects not only the texture but also the drape, weight, and warmth of the finished piece.
Remember that practice is essential:
the more you crochet, the more comfortable and proficient you will become.
Experimenting with different combinations of stitches can lead to unique and creative designs that showcase your style.
In turn, mastering the basics of these stitches provides a strong foundation for more advanced techniques in crochet.
Ultimately, the beauty of crocheting lies in its ability to transform simple yarn into intricate designs.
By understanding these basic stitches, new crocheters can embark on their crafting journey with confidence and enthusiasm.
The Essential Crochet Tool: Choosing the Right Hook
Choosing the right crochet hook is essential to ensure a comfortable and successful crocheting experience.
Crochet hooks come in various materials, sizes, and styles, each influencing the ease of your stitches and the overall appearance of your project.
Materials of Crochet Hooks
The most common materials for crochet hooks include:
- Aluminium: Durable and often very smooth, allowing for quick stitches.
- Bamboo: Lightweight with a warm feel, perfect for beginner crocheters as they are less likely to slip.
- Plastic: Inexpensive and available in vibrant colors, although they can sometimes lead to stiffness in movement.
Sizes of Crochet Hooks
Crochet hooks come in a range of sizes, typically designated by numbers or letters.
The size of the hook you choose impacts the gauge and spacing of your stitches.
To select the right size, consider the type of yarn you are using:
| Yarn Weight | Recommended Hook Size |
|---|---|
| Lace | Sizes 0-6 (0.6-1.8 mm) |
| Weight 4 (Worsted) | Sizes H (5 mm) to I (5.5 mm) |
| Bulky | Sizes J (6 mm) to K (7 mm) |
Grip and Handle Styles
Another aspect to consider is the grip and shape of the hook handle.
Some hooks come with ergonomic grips designed to reduce hand strain, especially important for those crocheting for extended periods.
“Finding the right hook can make your crocheting journey much more enjoyable.”
Ultimately, the choice
Yarn Varieties and Their Impact on Stitches
Choosing the right yarn is crucial for successful crocheting, as different yarn varieties can significantly affect the appearance and texture of your finished stitches.
Yarns come in various fibers, such as acrylic, cotton, wool, and blends, each offering unique characteristics.
Common Yarn Varieties
- Acrylic: Affordable and widely available, acrylic yarn is versatile and easy to care for, making it great for beginners.
- Cotton: Known for its durability and crispness, cotton yarn is ideal for summer garments and dishcloths. It showcases stitch definition exceptionally well.
- Wool: Warm and elastic, wool is excellent for cozy projects. It tends to be a bit more challenging to work with due to its tendency to stretch but provides fantastic warmth.
- Blended Yarns: Many yarns are blends of various fibers, offering a balance of properties. For example, a wool-acrylic blend can provide warmth and easy care.
The weight of yarn also plays an essential role in determining how your stitches will look and how thick your finished piece will be.
For instance, lighter weight yarns like lace or sport will create delicate, airy textures, whereas bulky or chunky yarns will produce thicker, more textured work.
Yarn Weight and Stitch Impact
| Yarn Weight | Typical Use |
|---|---|
| Lace | Shawls, doilies |
| Sport | Light garments, baby clothes |
| Worsted | Afghans, sweaters |
| Bulky | Warm garments, home decor |
Your choice of yarn will also influence the drape and overall feel of your crochet project.
Understanding how different fibers and weights affect your stitches can help you choose the
The Foundation Chain: Starting Your Crochet Project
The foundation chain is the first step in beginning any crochet project.
It serves as the base upon which all subsequent stitches are built.
Understanding how to create a strong and uniform foundation chain is fundamental to ensuring a successful and neat crochet work.
This section explores the techniques and tips for creating an effective foundation chain.
What is a Foundation Chain?
A foundation chain consists of a series of chain stitches that establish the initial row of your project.
It is crucial because it determines the length and flexibility of the resulting piece.
When starting your foundation chain, you generally need to make sure that it is neither too tight nor too loose.
If your chain is too tight, you may struggle to insert your hook for subsequent stitches.
Conversely, if it is too loose, your work may become floppy and uneven.
How to Create the Foundation Chain
To create a foundation chain, follow these steps:
- Make a slip knot on your hook.
- Yarn over and pull through the slip knot to form your first chain stitch.
- Continue yarn over and pulling through for the number of chain stitches required for your pattern.
It is important to count your chain stitches accurately as they form the basis of your project’s width.
Tips for a Perfect Foundation Chain
- Use a larger hook size than recommended for your yarn on the foundation chain to give yourself extra space.
- Practice creating tension by holding the yarn consistently as you chain.
- Before starting your main project, practice your foundation chain with scrap yarn.
Creating an even foundation chain not only improves the overall appearance of your project but also makes it easier to execute the subsequent rows.
As you develop your skills, remember that the foundation chain is more than just the beginning; it is the backbone of your crocheted masterpiece.
Basic Crochet Stitches Every Beginner Should Know
When starting out in crochet, mastering basic stitches is crucial for building your skill set and confidence.
There are several fundamental crochet stitches that form the foundation for countless patterns and projects.
1. Chain Stitch (ch)
The chain stitch is the most basic crochet stitch.
It is the starting point for almost every crochet project.
To make a chain stitch, simply wrap the yarn around the hook and pull it through the loop on your hook.
Start with a slip knot on your hook and continue pulling through until you reach your desired length.
- Slip knot: used to begin your work.
- Foundation chains: create the base for additional stitches.
2. Single Crochet (sc)
The single crochet stitch is another essential stitch for beginners.
To do a single crochet, insert the hook into the next chain stitch, yarn over, pull through, yarn over again, and pull through both loops on the hook.
This creates a tight, dense fabric which is great for various projects.
3. Half Double Crochet (hdc)
The half double crochet creates a taller stitch than a single crochet but is shorter than a double crochet.
To execute a half double crochet, yarn over first, insert the hook, yarn over again, pull through, and finish by pulling yarn through all three loops on the hook.
This stitch adds slight drape to your work.
4. Double Crochet (dc)
The double crochet stitch is known for its height.
Begin with a yarn-over, insert the hook into the stitch, yarn over, pull through, yarn over once more, and then pull through two loops twice.
This stitch is commonly used in blankets and garments.
5. Slip Stitch (sl st)
Finally, the slip stitch is used to join rounds or finish off your work.
It’s created by inserting the hook into the next stitch, yarning over, and pulling the yarn through both the stitch and the loop on the hook.
Understanding these stitches allows crocheters to progress easily to more intricate designs, giving a solid base from which creativity can flourish.
Exploring Advanced Stitches: Adding Complexity to Your Work
“`html
“`
Advanced crochet stitches open a world of creativity and complexity to your projects.
These stitches can transform simple patterns into intricate masterpieces.
Types of Advanced Stitches
- Shell Stitch: This involves a group of double crochets into the same stitch, creating a beautiful, rounded effect.
- V-Stitch: Alternates between double crochet and chain stitches, offering a stylish and airy design.
- Cabling: Similar to knitting, this technique creates twisted patterns within your crochet fabric.
- Filet Crochet: A method that combines open space with solid stitches to create designs, often used in lacework.
- Overlay Crochet: This involves layering stitches on top of existing stitches to create texture and depth.
How to Learn Advanced Stitches
1. **Practice Regularly**: Start by mastering one stitch at a time.
2. **Use Visual Guides**: Video tutorials are particularly helpful in visualizing complex techniques.
3. **Read Patterns Carefully**: Advanced stitches often require specific instructions, so take your time to understand them.
Benefits of Mastering Advanced Stitches
| Benefit | Description |
|---|---|
| Enhanced Creativity | Allows for more personal expression through varied designs. |
| Improved Skills | Challenges you to become more proficient in your craft. |
| Better Finished Projects | Produces work that is often more visually appealing and professional-looking. |
Learning advanced crochet stitches not only enhances your skill set but also boosts your confidence as a crocheter.
Experimenting with various combinations can lead to unique
How to Read and Follow Crochet Patterns
Reading and following crochet patterns can seem overwhelming, especially for beginners.
However, understanding the structure and terminology used in patterns is essential for successful projects.
Structure of Crochet Patterns
Most crochet patterns consist of several key components:
- Title: The name of the project, often providing insight into the type of item being created.
- Materials: A list of yarn brand, weight, color, and quantity, as well as the necessary tools like hooks and accessories.
- Gauge: This section delineates the number of stitches and rows per inch, helping ensure your project will come out the correct size.
- Instructions: The main body of the pattern, detailing step-by-step how to construct the item.
- Finishing: Information on how to complete and care for your project, including techniques like weaving in ends and blocking.
Common Crochet Abbreviations
Different patterns use abbreviations to save space. Familiarizing yourself with these can aid comprehension. Here are some commonly used abbreviations:
| Abbreviation | Meaning |
|---|---|
| ch | chain |
| sc | single crochet |
| dc | double crochet |
| sl st | slip stitch |
Steps to Follow a Pattern
When following a pattern, stay organized and take your time.
Start by reading through the entire pattern before you begin.
Break it down into smaller sections and focus on one part at a time to avoid feeling overwhelmed.
“Practice makes perfect; the more you crochet, the more fluent you will become in reading patterns.”
By gaining proficiency in these areas, you will find greater enjoyment and satisfaction in your crochet
Tips for Mastering Tension and Gauge in Your Stitches
Mastering tension and gauge is crucial for successful crocheting.
Tension refers to how tightly or loosely you hold your yarn as you work.
Gauge is the measurement of the number of stitches per inch in your work.
Getting these right ensures that your finished pieces fit as intended.
Understanding Tension
Tension affects the size of your stitches.
When your tension is too tight, your stitches may become dense and difficult to work with.
Conversely, if your tension is too loose, your pieces can become floppy and misshapen.
To manage tension, consider the following tips:
- Relax your grip on the yarn and hook.
- Practice with different yarn weights to find what feels comfortable.
- Take breaks during longer sessions to avoid fatigue.
Checking Gauge
To check your gauge, crochet a small swatch according to the pattern instructions.
Count the number of stitches and rows in a 4-inch square.
This helps determine if you’re on track.
If your gauge doesn’t match, you may need to adjust your hook size.
This table illustrates common adjustments:
| Gauge Result | Action |
|---|---|
| Too few stitches | Use a smaller hook |
| Too many stitches | Use a larger hook |
Practice Makes Perfect
The best way to improve your tension and gauge is through regular practice.
Experiment with various projects to see how changes in yarn types and hook sizes influence your work.
Remember, it’s normal to take time to find your unique style.
Embrace the learning process and enjoy every stitch along the way.
Strengthening your tension and gauge skills will enhance your overall crocheting experience.
Creative Ways to Combine Stitches for Unique Textures
Combining different crochet stitches can lead to innovative designs and unique textures that elevate your projects from ordinary to extraordinary.
Understanding Stitch Combinations
Combining stitches is about blending various techniques to create depth and visual interest.
Here are some popular stitches you can consider for combinations:
- Single Crochet (sc)
- Double Crochet (dc)
- Treble Crochet (tr)
- Half Double Crochet (hdc)
- Shell Stitch
- V-Stitch
Techniques for Combining Stitches
When combining stitches, it’s important to consider the following techniques:
- Texture Building: Alternate between tighter and looser stitches, like combining single crochet with double crochet.
- Color Changes: Use different yarn colors with each stitch type to create eye-catching patterns.
- Pattern Row Placement: Apply a combination of stitches in a row-wise technique, such as using shell stitches at the edges and single crochet in the centers.
Examples of Unique Textured Patterns
Here are a few examples of how you can create textured patterns by combining stitches:
| Pattern Name | Stitch Combination |
|---|---|
| Textured Waves | Alternating rows of sc and dc |
| Floral Motif | Combination of shell stitch and V-stitch |
| Basket Weave | Half double crochet and double crochet |
Combining stitches not only enhances the visual appeal of your crochet work but also allows you
1. Understanding the Basics of Crocheting Stitches
Crocheting begins with an understanding of basic stitches, which form the foundation for all crochet projects.
Stitches can essentially be categorized into three main groups:
- Simple Stitches: These include the chain stitch, single crochet, and double crochet. They are the building blocks for more complex designs.
- Complex Stitches: Once comfortable with the simple stitches, you can explore variations such as half double crochet, triple crochet, and specialty stitches like bobbles and shells.
- Textural Stitches: These stitches add dimension to your work and include techniques like popcorn stitches and cluster stitches.
Understanding how these stitches interact is crucial for achieving the desired outcomes in your projects.
Key Concepts to Grasp:
1. **Yarn Over:** This fundamental movement is used in many stitches. It involves wrapping the working yarn around the hook.
2. **Pulling Through Loops:** Most stitches require you to pull the yarn through one or more loops on the hook.
3. **Counting Stitches:** Accurate counting allows for consistent patterns and harmony in your work.
Practicing Basic Stitches
It is beneficial to practice these stitches on a simple swatch.
- Start with a chain of 10 stitches.
- Work a row of single crochet, then a row of double crochet.
- Keep track of your rows and stitches for reference.
This practice not only reinforces technique but also helps in visualizing how stitches can be combined in various projects.
Understanding the basics of crocheting stitches opens a world of creativity.
With dedication and practice, you’ll find that mastery over these foundational elements will lead to more intricate and beautiful crochet designs.
conclusion
In this journey of learning crocheting stitches, I hope you’ve discovered the joy and creativity that comes with this craft.
Whether you’re just starting out or looking to brush up on your skills, remember that practice makes perfect.
If you’re new to crocheting, check out A Beginner’s Guide to Crochet on The Spruce Crafts for helpful tips.
You might also want to explore How to Crochet for Absolute Beginners on Crochet Coach to solidify your foundation.
Understanding how to read patterns can be a game changer, so don’t hesitate to peek at How to Read a Crochet Pattern from Craft Yarn Council.
And for beginners, Basic Crochet Stitches for Beginners on Mama in a Stitch is a fantastic resource!
I’d love to hear your thoughts and experiences in the comments below.
And don’t forget to follow us on social media for more crocheting fun!
“`html
Frequently Asked Questions
What are the basic crocheting stitches?
The basic crocheting stitches include the chain stitch, single crochet, half double crochet, and double crochet. Mastering these foundational stitches will allow you to create a wide variety of patterns and projects.
How do I read a crochet pattern?
Reading a crochet pattern involves understanding the abbreviations and symbols used for different stitches. Familiarize yourself with common abbreviations such as ‘sc’ for single crochet and ‘dc’ for double crochet, as well as how to follow written instructions and stitch counts.
Can I use different yarn weights for the same stitch?
Yes, you can use different yarn weights with the same stitch, but this will affect the overall appearance and size of your finished project. Thicker yarn will create a bulkier look, while finer yarn will result in a more delicate finish.
What tools do I need to start crocheting?
To start crocheting, you will need a crochet hook, yarn, and scissors. Optional tools include a yarn needle for weaving in ends and stitch markers for keeping track of your place in complex patterns.
How do I fix mistakes in my crocheting?
If you make a mistake, you can rip out (frog) your stitches back to where the error is and continue from there. Tools like stitch markers can help prevent future mistakes, and practicing will improve your confidence.
What is a gauge in crocheting?
Gauge refers to the number of stitches and rows per inch/centimeter in a crocheted piece. Checking your gauge before starting a project is crucial to ensure that your finished work matches the intended size of the pattern.
Similar Posts

Crochet Shell Stitch Lap Blanket Pattern and Instructions
Discover how to create a cozy crochet shell stitch lap blanket with this easy step-by-step tutorial. Grab your hooks and start crafting your own today!

crochet earrings pattern
Create stunning crochet earrings with our easy-to-follow pattern guide. Perfect for beginners and seasoned crafters alike. Discover your next project today!

crochet dragon
Discover how to create your own crochet dragon with this detailed tutorial. Get step-by-step instructions and tips to unleash your creativity today!

crochet duck
Discover how to create an adorable crochet duck with our step-by-step tutorial. Perfect for beginners, this project is fun and easy to follow. Get started today!

magic ring crochet
Discover the magic ring crochet technique with our step-by-step guide. Perfect for beginners, this tutorial will enhance your crochet skills and projects. Start learning today!

easy crochet blanket
Discover how to create a cozy crochet blanket with simple patterns and step-by-step instructions. Get started on your crafting journey with ease today!