
crochet slip stitch
Crochet slip stitch is one of those essential techniques that every crocheter should know. Whether you’re a beginner or a seasoned pro, mastering the slip stitch can elevate your projects. It’s a simple yet effective way to join pieces, move across rows, or create delicate edges. If you’re curious about how to do it, check out this guide that breaks it down step by step.
You might think of the slip stitch as the quiet hero in crochet. It’s not flashy like the single crochet, but it definitely plays a vital role. From creating smooth edges to connecting rounds in your work, it’s just so versatile. If you’re eager to practice, you can also explore various crochet stitch patterns that incorporate the slip stitch for great effects.
Don’t forget, this technique is part of the basic crochet stitches that form the foundation of many projects. So, let’s dive in and unravel the magic of the crochet slip stitch today!
“`html
“`
What is a Crochet Slip Stitch?
The crochet slip stitch, often abbreviated as “sl st,” is one of the foundational techniques in crocheting that allows crafters to join pieces of fabric, create seams, or move the working yarn smoothly across rows without adding height.
A slip stitch is characterized by its unique execution where you insert the hook into a stitch, yarn over, and pull through both the original stitch and the loop on the hook in one fluid motion.
This technique does not contribute to the height of the work, making it an essential skill for various applications.
Characteristics of the Slip Stitch
- Fastens different sections of work together.
- Creates a flat and discreet join, minimizing bulk.
- Facilitates a clean transition between rows.
Because of its versatility, the slip stitch is used in numerous crochet projects, including blankets, garments, and accessories.
When to Use a Slip Stitch
Slip stitches are particularly useful in the following scenarios:
- Joining rounds in circular crochet.
- Creating borders on flat pieces.
- Moving the yarn to a non-adjacent stitch while maintaining a uniform fabric.
The slip stitch also opens doors to creative variations such as decorative slip stitches that can enhance the texture and aesthetic of crochet items.
In summary, understanding the crochet slip stitch is pivotal for both beginners and seasoned crocheters alike.
Mastering this technique will bolster your ability to tackle more complex projects with confidence.
It serves not just as a technique but also as a stepping stone into the world of crocheted artistry.
History and Origin of the Slip Stitch
The slip stitch is one of the fundamental techniques in crochet, boasting a rich history that traces back to the origins of the craft itself.
Crochet, as a needlework technique, is believed to have emerged in the early 19th century, although its roots may extend further back through other forms of textile creation.
The slip stitch, used for joining or finishing work, has been essential in giving structure and neat edges to various crochet pieces.
Early Uses and Cultures
The slip stitch may not have been formally recognized in early crochet patterns but was likely utilized in various cultures that practiced yarn crafting.
Some key points include:
- Early crochet forms were primarily created in Europe, influenced by knitting and lace-making traditions.
- Notably, the English and French contributed significantly to the development of crochet techniques, including the slip stitch.
- Patterns from the Victorian era showcase intricate designs where slip stitches played a role in finishing techniques.
Modern Revival
In contemporary times, the slip stitch has gained renewed attention within the crafting community.
The rise of the internet and social media platforms has allowed for a resurgence of interest in traditional techniques, including slip stitching.
Today, crafters share tutorials and patterns that highlight the practical and aesthetic applications of slip stitches in various projects.
Textile Arts Influence
The integration of slip stitches into different textile arts—like knitting and embroidery—further illustrates its versatility.
The adaptability of the slip stitch has allowed it to endure through centuries, cementing its place as a core technique in modern crochet practices.
In sum, the history of the slip stitch reflects its importance in crafting traditions, demonstrating how a simple technique can have profound implications in the artistic landscape of crochet.
Essential Tools for Crochet Slip Stitching
To successfully execute a crochet slip stitch, having the right tools is crucial.
These tools not only make the process easier but also enhance the overall quality of your work.
1. Crochet Hook
The primary tool you need is a crochet hook.
Crochet hooks come in various sizes and materials, such as aluminum, steel, plastic, and bamboo.
Choosing the correct size is essential; generally, a hook one or two sizes larger than the one used for the other stitches in your project is ideal for slip stitching.
You can explore more about different crochet hook types on this link.
2. Yarn
Next, you need yarn.
The type and weight of yarn will affect the appearance of your slip stitches.
For beginners, a medium-weight yarn is recommended as it’s easier to manage.
Moreover, using a contrasting color yarn can help you see your slip stitches more clearly, which is beneficial for practice.
3. Scissors
Scissors are essential for cutting yarn once you’ve finished your project.
Having sharp, precise scissors will allow you to make clean cuts, preventing fraying.
For some projects, you might also require a tapestry needle for weaving in loose ends, which helps in finishing your work neatly.
4. Stitch Markers
Stitch markers can be very helpful, especially if you are working on larger projects where you may lose track of your slip stitches.
These markers help keep your counts accurate and maintain even spacing.
5. Measuring Tape
Finally, a measuring tape can be used for ensuring your project meets the desired dimensions.
Keeping these tools on hand will significantly enhance your crochet experience.
Having the right tools simplifies the slip stitching process and increases your efficiency, allowing you to focus on creativity and technique.
For detailed guides on various crochet techniques, you can refer to this article.
Step-by-Step Guide to Executing a Slip Stitch
Executing a slip stitch in crochet is a fundamental technique that can enhance your projects significantly.
In this guide, we will take you through the process in a clear and straightforward manner to make it easy to follow.
Step 1: Prepare Your Yarn and Hook
Ensure you have the appropriate yarn and crochet hook for your project.
Refer to the pattern details for the recommended yarn weight.
Step 2: Begin with Your Foundation Row
Start by creating your foundation chain.
Make sure it’s the right length needed for your pattern.
If you’re joining rounds, create a slip knot and chain the required number of stitches.
Step 3: Insert Your Hook
To execute a slip stitch, insert your hook into the stitch you wish to work into.
This could be the next stitch in your row or the first stitch when joining rounds.
Step 4: Yarn Over and Pull Through
Yarn over the hook and draw the yarn through the stitch you just inserted into.
At this point, you will have two loops on your hook.
Step 5: Complete the Slip Stitch
Now, yarn over again and pull through both loops on your hook.
This completes one slip stitch.
Step 6: Repeat as Necessary
Continue to insert your hook into the next stitch, yarn over, and pull through both loops for each subsequent slip stitch.
Remember to keep your tension consistent for a neat finish.
Practice Makes Perfect
Slip stitch is a simple stitch, but mastering it will enhance your crochet skills greatly.
You can practice by making swatches or small projects just to get the hang of the technique.
As you become more comfortable, you’ll find it easier to incorporate slip stitches into more intricate designs.
Common Applications of Slip Stitch in Crochet Projects
The slip stitch is a versatile crochet technique that serves multiple purposes within various projects.
One of the most common applications is in joining rounds.
When working in the round, especially for items such as hats or bags, a slip stitch can seamlessly connect the last stitch of a row to the first stitch, creating a continuous loop.
Additionally, slip stitches are key in shaping crochet items.
They can be employed to create straight edges or smooth transitions between rows, particularly when switching between colors or techniques.
Edging and Finishing Touches
In projects that require a clean, polished finish, such as blankets or garments, slip stitches can be used as an edging technique.
This not only prevents the fabric from unraveling but also gives a neat look to the borders.
Here are some specific common uses of slip stitches:
- Joining two pieces of fabric together.
- Creating a decorative edge on scarves and blankets.
- Shaping and reducing stitches in amigurumi projects.
Creating Texture and Design
Slip stitches can also be used to create texture in the fabric.
By working slip stitches in various patterns or colors, crocheters can generate unique designs and effects.
For example, using slip stitches with contrasting yarn can highlight specific areas of a project, adding visual interest.
Moreover, slip stitches are often utilized in the foundation chain.
This ensures a flexible and sturdy base for various crochet items, which is particularly beneficial for projects that require elasticity.
In summary, the slip stitch plays a pivotal role in many crochet applications.
Its adaptability allows crocheters to enhance their projects, whether through seamless joins, decorative edgings, or innovative textures.
The slip stitch is an essential technique in every crochet artist’s repertoire, ensuring both functionality and aesthetic appeal in their creations.
Variations of the Slip Stitch Technique
The slip stitch is a versatile crochet technique that can be adapted in various ways to achieve different effects in your projects.
1. Regular Slip Stitch
The regular slip stitch is the most basic form.
It is typically used for joining rounds or closing gaps.
The execution is straightforward: pull the yarn through the stitch and the loop on your hook simultaneously.
2. Decorative Slip Stitch
This variation adds a decorative flair to your work.
By combining different colored yarns or adding textures, you can create patterns that enhance visual appeal.
Decorative slip stitches can work wonderfully as borders or detail accents on larger projects.
3. Slip Stitch Crochet Join
This technique is often used in amigurumi and other shapes where seams need to be less visible.
Rather than a typical join, a slip stitch join can eliminate gaps, resulting in a neater finish.
It maintains the structural integrity while providing a seamless look.
4. Slip Stitch in the Back Loop
When you work slip stitches only in the back loop, it creates a distinct ridge effect.
This is useful for textured patterns or creating fabric with a unique feel.
It can also serve to create lines or pathways in your crochet designs.
5. Slip Stitch as a “Chainless” Foundation
Using slip stitches to create the foundation of your project is another innovative method.
Rather than beginning with a chain, you can create a row of slip stitches which offers more elasticity.
This is particularly beneficial for tight gauge patterns or stretchy items.
In summary, exploring the variations of the slip stitch can profoundly impact the functionality and aesthetic of your crochet projects.
Experimenting with these techniques can deepen your crochet skills and expand creative possibilities.
Troubleshooting Common Mistakes with Slip Stitch
When mastering the crochet slip stitch, it’s common to encounter a few mistakes that can affect your work’s appearance and functionality. Troubleshooting these issues is essential for achieving clean and professional results.
1. Incorrect Tension
One of the most prevalent mistakes in slip stitching is inconsistent tension.
- Too tight: This can make your stitches hard to maneuver, resulting in puckering.
- Too loose: This can lead to an uneven appearance and gaps between stitches.
To achieve consistent tension, practice maintaining a relaxed grip on your yarn and hook.
2. Misplacement of Stitches
Another common issue arises from misplacing the slip stitch.
- Skipping stitches: This can create gaps in your work.
- Accidentally working into the wrong loop: This results in uneven edges.
Use stitch markers to keep track of your stitches and ensure that each slip stitch is placed correctly.
3. Wrong Hook Size
Using a hook that’s too large or too small can significantly impact your slip stitch’s appearance.
| Hook Size | Effect |
|---|---|
| Large Hook | Loose and floppy stitches |
| Small Hook | Tightly pulled stitches |
Be sure to match your hook size with the yarn’s recommended gauge.
4. Not Following the Pattern
Finally, straying from the pattern instructions can lead to mistakes.
“Patterns are your best guide; following them carefully helps avoid errors.”
Pay close attention to counting stitches and following the specific instructions related to slip stitching.
By being aware of these common mistakes and taking steps to correct them, you can improve your slip stitching technique and achieve clean, beautiful results in your crochet projects.
Combining Slip Stitch with Other Crochet Techniques
Combining slip stitch with other crochet techniques can greatly enhance the texture, appearance, and structure of your projects.
The slip stitch itself serves as a versatile component in various crochet applications, and when paired with other methods, it can yield stunning results.
1. Joining Techniques
One common use of slip stitches is in joining motifs or pieces in a project.
When you want to connect two pieces of crochet together, using a slip stitch creates a seamless finish.
For instance, when working with granny squares, you can use slip stitches to connect the squares without visible seams, making the final product look cleaner and more professional.
2. Edging and Finishing
Using slip stitches can also add a finished edge to projects such as blankets, scarves, and garments.
Applying a slip stitch edge can give a subtle rise to your projects, differentiating between sections or colors.
- Single crochet followed by slip stitch for stability.
- Double crochet and slip stitch combo for texture variation.
- Crab stitch with slip stitch for decorative borders.
3. Creating Texture
Combining slip stitch with other stitches can also create unique textures.
For example, alternating between slip stitch and double crochet can yield a visually appealing pattern.
“By experimenting with different combinations, you can develop your own unique crochet style.”
4. Incorporating Slip Stitch into Color Work
When working with color changes, slip stitch can help secure the new yarn and create a neat transition between colors.
Slip stitches provide a perfect way to lock off your previous color while preparing to start a new one.
Tip: Always ensure your slip stitches are evenly placed to maintain consistent tension.
Slip stitch can be a cornerstone of your crochet technique repertoire, enabling you to explore creative avenues that enhance your projects.
Tips for Mastering the Slip Stitch
To truly master the slip stitch in crochet, consider the following tips that can enhance your technique and boost your confidence.
Understanding Tension
Maintaining consistent tension is crucial when working slip stitches. Too tight, and it may be challenging to work the next stitch; too loose, and your project could look uneven.
- Practice keeping your yarn taut but not overly tight.
- Adjust the size of your hook if necessary to achieve the desired tension.
Practice Makes Perfect
As with any crochet technique, frequent practice leads to improvement. Set aside time to execute slip stitches on a scrap piece of yarn.
| Practice Tip | Description |
|---|---|
| Short Rounds | Create small circles, practicing both joining and single slip stitches. |
| Unused Yarn | Use leftover yarn from other projects to practice without waste. |
Experiment with Slip Stitch Use
Try using slip stitches in various patterns and projects.
- Integrate into edging for a polished look.
- Create patterns by combining with double crochet or single crochet for textural contrast.
Timing and Rhythm
Establish a rhythm that works for you when executing slip stitches.
“The right pace can make all the difference in achieving beautiful, even stitches.”
Watch Video Tutorials
Visual aids can greatly assist in mastering crochet techniques.
Search for tutorials focusing on the slip stitch for visual guidance and techniques.
By paying attention to these details and practicing regularly, you’ll find that mastering the slip stitch becomes a rewarding endeavor that enhances your overall crochet skills.
1. What is a Crochet Slip Stitch?
A crochet slip stitch, often abbreviated as “sl st,” is one of the foundational stitches in crochet.
It is commonly used to connect rounds or rows, giving your work a seamless appearance.
The slip stitch is created by pulling a yarn through a loop on the hook and the previous stitch simultaneously, resulting in a tight, flat finish.
This technique is particularly useful when working in the round or when changing colors.
Unlike other crochet stitches that create height, the slip stitch lies flat.
This makes it an ideal choice for edging, joining, and creating textured patterns.
Overall, mastering the slip stitch is essential for any crocheter, whether you’re just starting or you’re experienced.
Characteristics of the Slip Stitch
- It creates a nearly invisible seam, perfect for joining pieces.
- It works well for finishing off projects, providing a clean edge.
- It is often used to create a slip knot to start a project.
The slip stitch can also be used to create intricate designs and textures in advanced crochet projects.
By manipulating the tension and placement of the slip stitch, you can produce various effects, such as raised designs or delicate lacework.
In essence, while simple, the slip stitch is a versatile tool in the crocheter’s toolkit, essential for a wide range of applications from basic to complex projects.
Understanding its function and versatility can significantly enhance your crochet experience and strategy.
conclusion
Crochet slip stitches are super handy and fun to learn.
They can make your projects look neat and polished, while also joining pieces together seamlessly.
If you’re just starting out, the slip stitch is a great way to build your skills and confidence.
Plus, it opens the door to exploring other exciting techniques!
For more guidance on the basics, check out this fantastic resource on basic crochet stitches.
And if you want to dive deeper into different crocheting styles, this website has a treasure trove of information.
Feel free to share your crochet adventures and slip stitch projects in the comments below!
I am eager to hear what you’ve created and if you have any tips to share.
Don’t forget to follow us on our social media platforms for more crochet tips and inspiration!
Let’s crochet together and celebrate our creativity!
Frequently Asked Questions
What is a crochet slip stitch?
A crochet slip stitch is a basic stitch used in crochet which allows you to join yarns or move the yarn along the row without adding height, creating a seamless finish.
How do you make a slip stitch in crochet?
To make a slip stitch, insert your hook into the stitch you wish to join, yarn over, and pull the yarn through both the stitch and the loop on your hook.
When should I use a slip stitch?
Use a slip stitch for joining rounds, finishing off projects, or when you need to move yarn across stitches without adding height, such as in pattern transitions.
Can slip stitches be used for edging?
Yes, slip stitches can create a neat edge in your projects and can be used to add firmness and finish to edges.
Are slip stitches tight or loose compared to other stitches?
Slip stitches are generally tighter than other crochet stitches because they don’t use extra yarn to create height, making them a great choice for precise fitting.
What projects benefit from using slip stitches?
Slip stitches are helpful in various projects, including amigurumi, blankets, hats, and garments, especially when joining pieces or creating a clean finish.
Can slip stitches be worked in different patterns?
Absolutely! You can incorporate slip stitches into patterns, using them as decorative elements or as a method to create textures in your crochet work.
What is the difference between a slip stitch and a chain stitch?
A slip stitch
Similar Posts

mesh crochet stitch
Explore the mesh crochet stitch with this comprehensive guide. Discover how to create beautiful patterns with easy-to-follow instructions. Start crafting today!

crochet dragon
Discover how to create your own crochet dragon with this detailed tutorial. Get step-by-step instructions and tips to unleash your creativity today!

Bavarian Crochet Stitch: A Step-by-Step Guide for Beautiful Patterns
Discover the Bavarian crochet stitch with our detailed tutorial. Learn techniques and tips to create stunning patterns. Start crocheting beautiful projects today!
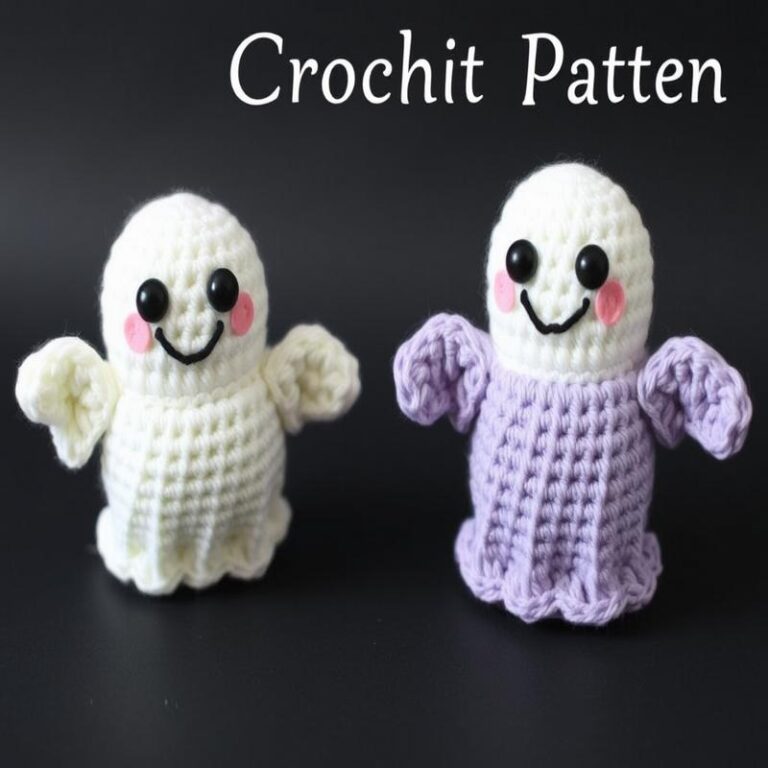
crochet ghost pattern
Discover a fun crochet ghost pattern perfect for Halloween decorations. Follow our step-by-step guide to create this charming and spooky masterpiece. Start crocheting today!

flower crochet
Explore the art of flower crochet with step-by-step tutorials and easy patterns. Discover tips to create beautiful floral designs and enhance your crochet skills.

slip stitch crochet
Discover the art of slip stitch crochet with our step-by-step guide. Learn techniques and tips to create beautiful projects effortlessly. Start crafting today!