
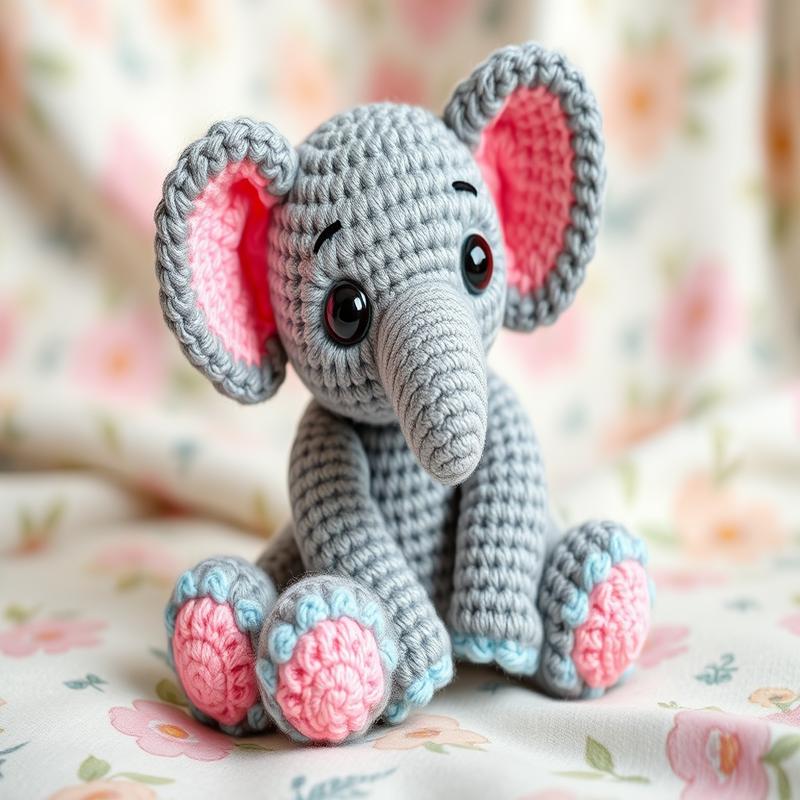
crochet elephant
Crocheting an elephant is a delightful way to blend creativity with a touch of cuteness. I remember the first time I picked up my hook and yarn, wanting to create something playful and unique.
There’s something magical about transforming simple stitches into a three-dimensional plush toy. If you’re new to crocheting, you might want to start with the basic crochet stitches before diving into the world of amigurumi. As you get a feel for the yarn, you’ll love exploring various crochet stitch patterns that can give your elephant character and flair.
One of my favorite parts is mastering amigurumi techniques—those little tricks that bring your creations to life. Plus, learning about different crochet stitches can really enrich your crafting journey. Whether you aim for a classic grey elephant or a whimsical rainbow version, the choice is yours!
Let’s embark on this fun adventure together and create an adorable crochet elephant that’s sure to bring smiles!
“`html
“`
1. Materials Needed for Crocheting an Elephant
Crocheting an elephant can be a delightful and rewarding project.
It requires specific materials to ensure that your creation turns out beautifully and is durable.
Below is a comprehensive list of essential materials you’ll need to get started.
Yarn
Choosing the right yarn is crucial for your project.
Opt for soft, durable yarn that will give your elephant a nice texture.
Some of the best yarn options for crocheting an elephant include:
- Worsted weight yarn (category 4) – offers a balance of thickness and ease of use.
- Acrylic yarn – affordable and wide range of colors.
- Cotton yarn – provides a sturdy finish, suitable for toys.
Crochet Hook
The size of your crochet hook will depend on the yarn you choose.
Typically, a G (4mm) or H (5mm) hook goes well with worsted weight yarn.
It is advisable to check the yarn label for specific recommendations.
Stuffing
To give your elephant its shape, you will need stuffing material.
Here are some common options:
- Polyester fiberfill – commonly available and easy to work with.
- Natural cotton stuffing – eco-friendly and biodegradable.
- Old fabric scraps or yarn tails – a sustainable alternative.
Safety Eyes
If you plan to make amigurumi-style elephants, safety eyes are essential for a cute and safe finish.
Safety eyes come in various sizes and colors.
Stitch Markers and Scissors
A stitch marker will help you keep track of your rounds.
A pair of scissors is necessary to cut your yarn when finishing off your project.
By gathering these materials, you’ll be well-prepared to embark on your crocheting adventure to create an adorable elephant.
Basic Crochet Stitches for Elephant Patterns
When it comes to crocheting an elephant, understanding basic crochet stitches is essential.
These stitches form the foundation of your project and are vital for achieving a neat and defined shape.
Here are some fundamental stitches you need to know:
- Chain Stitch (ch): The starting point for most crochet patterns. Create a series of knots to begin your work.
- Slip Stitch (sl st): Used to join pieces together seamlessly or to move yarn without adding height.
- Single Crochet (sc): A straightforward stitch that forms a tight fabric, ideal for amigurumi projects like the elephant.
- Half Double Crochet (hdc): A stitch that provides a bit more height than single crochet while still being compact.
- Double Crochet (dc): Gives more height and flexibility, used mainly in larger parts of the elephant, like the body.
Each stitch plays a crucial role in constructing the elephant’s body structure, adding to its overall design, and ensuring that the fabric holds its shape.
Specialized Stitches for Detail
In addition to the basics, it may be beneficial to familiarize yourself with some specialized stitches:
- Increase Stitches: Create additional stitches in a row, allowing your piece to expand, which is key for shaping the elephant’s body.
- Decrease Stitches: Reduce the number of stitches in a row to taper off parts such as the trunk or legs.
For precise shaping and neat edges, mastering these stitches will significantly enhance your crocheting skills.
“The beauty of crochet lies in its versatility and creativity.”
Keep practicing, as fluency in these basic stitches opens up endless possibilities in your elephant crafting project.
Choosing the Right Yarn and Hook Size
When it comes to crocheting an elephant, selecting the appropriate yarn and hook size is crucial for achieving the desired shape and texture.
The first consideration is the type of yarn.
You will generally want a medium-weight yarn, such as worsted weight (category 4) for ami style crochet.
Yarn made from acrylic or cotton is often recommended due to their durability and ease of care.
The choice of color can also enhance your elephant, whether opting for traditional grays or vibrant hues.
Next, choosing the right hook size is essential.
Typically, a size G (4.0 mm) or H (5.0 mm) crochet hook works well for most worsted weight yarns.
However, it’s best to consult the yarn label for specific recommendations since the exact hook size can vary based on the yarn material and your personal tension.
To find your ideal hook size, consider conducting a small sample swatch.
This method allows you to test stitches and ensure your crochet fabric has the right density and structure.
If it’s too loose, switch to a smaller hook.
Conversely, if it’s too tight, try a larger one.
There are also specific yarn weights and hook sizes that are particularly popular among crocheters.
These can include:
- Baby elephants often use a lighter worsted weight with a 3.5 mm hook for finer detail.
- Full-sized elephants might use heavier worsted yarn with a 5.5 mm hook for a bulkier look.
- Specialty yarns, such as boucles or textured yarn, can add unique flair but might require larger hooks.
For additional guidance on crochet techniques and materials, you can explore helpful resources such as Lion Brand and Craft Yarn Council.
Using the right materials not only influences the final aesthetic but also impacts the ease of creating your adorable elephant.
Step-by-Step Guide to Crocheting the Body
Crocheting the body of your elephant is one of the most rewarding parts of the project.
It serves as the foundation for all the parts you’ll be adding later.
Follow these steps to create a cute and sturdy body for your amigurumi elephant.
Materials Required
Before you begin, gather the following materials:
- Yarn in your chosen color (main body color)
- Appropriate crochet hook (usually a size G or H)
- Scissors
- Yarn needle for weaving in ends
- Stuffing (fiberfill or similar material)
Body Pattern Instructions
Start by making a magic ring.
This will form the base of your elephant’s body.
Follow this pattern:
1. **Round 1**: Chain 2, make 6 single crochets (sc) into the magic ring.
2. **Round 2**: Make 2 sc in each stitch around (12 stitches).
3. **Round 3**: *1 sc, 2 sc in next stitch* repeat around (18 stitches).
4. **Round 4-8**: Work 1 sc in each stitch around (18 stitches for each round).
Increasing and Shaping the Body
To form the shape of the body, continue increasing:
5. **Round 9**: *2 sc, 2 sc in next stitch* repeat around (24 stitches).
6. **Round 10-13**: 1 sc in each stitch around (24 stitches).
7. **Round 14**: *2 sc, dec (decrease)** repeat around (18 stitches).
8. **Round 15**: 1 sc in each stitch around (18 stitches).
Finishing Up
At this point, you should have a tapered body for your elephant.
Add stuffing gradually to ensure it keeps its shape.
Once stuffed, close the opening using a yarn needle and the remaining stitches.
This process sets the stage for creating limbs, ears, and other elements that will bring your crocheted elephant to life.
Enjoy the satisfaction of each completed stitch as you move toward a beautifully crafted amigur
Crafting the Elephant Ears: Techniques and Tips
Crocheting the ears of an elephant can be a delightful and rewarding process as they are essential features that contribute to the overall charm and character of your amigurumi creation.
Types of Elephant Ears
Generally, there are two common styles for crocheted elephant ears:
- Flat Ears: These are simple and often shaped like large leaves, providing a classic look.
- Folded Ears: This style gives a more realistic appearance, with a slight curve at the base as if they are flopping over.
Selecting the right type of ear will set the tone for your elephant’s design.
Basic Techniques for Ears
1. **Starting with a Magic Ring**: This is an essential technique to keep your base tight and rounded. It allows for a neat finish.
2. **Increasing Stitches**: To create the shape of the ear, you will need to add increases in every few rows. This will give the ear its unique form.
3. **Short Rows for Folding**: If opting for folded ears, consider using short rows to create a foundational crease. This adds dimension and realism.
Tips for Crafting Ears
– **Gauge Matters**: Always crochet a swatch to ensure your size matches the desired outcome.
– **Use Stitch Markers**: These are invaluable for keeping track of your rounds; they can simplify the process immensely.
– **Embellishments**: To enhance your elephant’s ears, consider adding accents like a contrasting color or embroidery to mimic the veins found in real elephant ears.
“Craftsmanship is in the details; take your time to perfect the ears, and your elephant will surely capture hearts.”
With practice and attention to detail, crafting elephant ears can be a joyful part of your amigurumi adventure, making your project feel complete and giving it a personal touch.
Making the Trunk: Design Options and Instructions
“`html
“`
Creating an adorable elephant trunk is essential to your crocheted masterpiece.
The trunk gives your elephant its distinct character.
Here, we will explore various design options and provide step-by-step instructions to craft a perfect trunk.
Design Options
When designing your elephant’s trunk, consider these options:
- Classic Straight Trunk: A simple and traditional option, perfect for beginners.
- Curling Trunk: Adds a playful touch with a curled end, resembling a baby elephant’s trunk.
- Flexible Trunk: Incorporates wire inside for poseable options, allowing you to shape the trunk as you like.
Instructions for a Classic Straight Trunk
Follow these steps to create a simple trunk:
1. **Materials Needed:**
– Yarn in a matching color for the body
– Appropriate hook size
– Scissors
– Yarn needle
2. **Chain Stitch:**
– Start with a foundation chain of 15 stitches for the desired length.
3. **Single Crochet Rows:**
– Row 1: 15 single crochets (sc) in the 2nd chain from the hook, turn.
– Row 2: sc across in each stitch (16 stitches).
– Repeat this for 10-15 rows until the trunk reaches the desired thickness (about 4-6 inches).
4. **Shaping the Trunk:**
– To taper the trunk, decrease the number of stitches in the last two rows:
– Row 14: sc in first 13 stitches, turn.
– Row 15: sc in first 11 stitches, turn.
5. **Finishing:**
– Cut the yarn, leaving a long tail to sew the trunk onto the elephant’s face.
– Use a yarn needle to weave in any loose ends.
With these design choices and instructions, you can create a trunk
Attaching the Legs and Tail: A Detailed Approach
When it comes to completing your crocheted elephant, attaching the legs and tail is a crucial step that brings the whole piece together.
It’s important to ensure that the legs are evenly spaced and securely attached so your elephant stands well.
Materials Needed for Attachment
Before starting, gather the following materials:
- Yarn needle
- Scissors
- Polyester stuffing (if you need to fill the legs)
- Stitch markers (optional, for positioning)
Positioning the Legs
To attach the legs, first determine their placement on the body.
Start by folding the body slightly to find the front and back.
Typically, the legs are attached approximately one-third of the way up from the bottom of the body.
You may wish to use stitch markers to secure them in place temporarily.
“A well-placed leg ensures better balance for your elephant.”
Techniques for Attaching the Legs
When you have found the right position, use the yarn needle to sew each leg onto the body using a whip stitch or a slip stitch.
Insert the needle through both the leg and the body, making sure to keep your stitches tight but not too tight to avoid warping the shape.
Continue stitching around until the leg feels secure.
Repeat the process for all four legs.
Attaching the Tail
For the tail, choose a thin piece of yarn to create a simple strand.
You may use a chain stitch for a bit of texture or simply attach a single piece directly to the body’s back end.
Secure with a few stitches ensuring that it stands upright.
Finally, trim any excess yarn as needed, and your elephant is now completed with properly attached legs and tail.
With practice, you will refine your technique for even better results in your future projects.
Adding Details: Eyes, Tusks, and Other Features
Detailing your crocheted elephant can transform it from a simple plush into a lifelike creation.
Adding eyes, tusks, and other unique features will enhance its personality and charm.
Eyes
For the eyes, you can either crochet them or use safety eyes, which are widely available in craft stores.
If crocheting:
- Use black yarn for a classic look.
- Make two small rounds with a magic ring and single crochets.
- Stuff them lightly before closing.
If using safety eyes:
- Choose a size that suits your elephant’s proportions.
- Secure them tightly to avoid safety hazards.
Tusks
Tusks can be an adorable addition that emphasizes your elephant’s features.
You can create tusks with a simple crochet chain or use felt for a flatter look.
For crocheted tusks:
- Using white or ivory-colored yarn, make a chain of 5-6 stitches.
- Single crochet back into the chain to form a conical shape.
- Attach the tusks securely to the head.
Other Features
Other decorative elements may include:
- Creating a tail with long chains or pom-poms.
- Adding a blanket or saddle using contrasting yarn colors for a unique touch.
- Embroidering additional details like nostrils or patterns on the body.
Each added detail will enhance the uniqueness of your crochet elephant, making it a cherished item or gift.
As you add these finishing touches, remember to experiment with textures and colors to reflect your creativity.
The end result will be a delightful elephant that stands out, showcasing your crochet skills and artistic flair.
Amigurumi Techniques for a Flawless Finish
Amigurumi, the Japanese art of crocheting or knitting small stuffed animals, requires certain techniques to ensure a polished and flawless finish.
1. Join as You Go
When creating multiple components for your elephant, joining them as you go can help in achieving a seamless look.
- Use a slip stitch to connect pieces as you finish them.
- This method prevents excessive sewing later and helps maintain the shape of the components.
2. Invisible Decrease
To ensure that your stitches don’t create gaps, utilize the invisible decrease technique.
“This technique is crucial for maintaining the smoothness of your finished project.”
3. Stuffing Techniques
Proper stuffing is key to achieving a well-shaped elephant. Here are some tips:
- Use polyester fiberfill for a soft and fluffy finish.
- Make sure to distribute the stuffing evenly to avoid lumps or overly dense areas.
- Use a chopstick or a wooden dowel to push stuffing into small areas, like the trunk or ears.
4. Finishing Touches
After assembling your elephant, pay attention to the finishing details.
| Detail | Technique |
|---|---|
| Weaving in Ends | Use a tapestry needle to weave in yarn ends securely. |
| Sealing Edges | For a more professional look, consider using a whip stitch to seal edges that, if not joined well, appear ragged. |
Employing these amigurumi techniques will not only elevate your elephant crochet project but also enhance your overall crocheting skill. With patience and practice, you’ll achieve a flawless finish that showcases your hard work and creativity.
1. Materials Needed for Crocheting an Elephant
To embark on your journey of crocheting an adorable elephant, gathering the right materials is essential.
Yarn:
Choose a soft, durable yarn suitable for amigurumi projects.
Popular options include:
- Worsted weight acrylic yarn
- Cotton yarn for added structure
- Chenille yarn for a plush effect
Hook:
The hook size should match your yarn’s weight.
Common sizes include:
- G (4.0 mm) for worsted weight yarn
- F (3.75 mm) for finer yarn
Stuffing:
Quality stuffing is necessary for a finished, firm shape.
Options include:
- Polyester fiberfill for a soft touch
- Natural wool for eco-friendly choices
Safety Eyes:
Consider using safety eyes to give your elephant character.
These are available in different sizes and colors.
Tapestry Needle:
A tapestry needle is crucial for sewing pieces together and weaving in ends.
Scissors:
Sharp scissors will help you trim yarn cleanly, ensuring neat work.
Measuring Tape:
While not mandatory, a tape measure can assist in ensuring your pieces are proportionate.
With these materials at hand, you are well on your way to creating a charming crocheted elephant.
Ensure to select colors that resonate with your personal aesthetics or the recipient’s favorite hues.
Don’t forget to enjoy the process and experiment with textures and patterns!
conclusion
So there you have it, my fellow crafters! Creating a crochet elephant is such a fun and rewarding experience.
Whether you’re a beginner or a seasoned pro, this adorable project is perfect for everyone.
If you’re just starting out, I highly recommend checking out these basic crochet stitches to get you on the right track.
Don’t forget to grab some supplies from amazing crochet kits that have everything you need in one place.
For more tips on how to crochet, be sure to visit this handy guide.
I really want to hear about your crochet adventures, so drop a comment below and share your creations!
Also, make sure to follow us on social media for more awesome projects and inspiration.
Happy crocheting, and may your elephants be extra cute!
“`html
Frequently Asked Questions
What materials do I need to crochet an elephant?
To crochet an elephant, you will need yarn in your desired colors, a crochet hook (usually size G or H), stuffing (like fiberfill), a yarn needle for stitching, and safety eyes or black embroidery floss for the eyes.
Is it difficult to crochet an elephant for a beginner?
While crocheting an elephant may seem challenging, it is a great project for beginners. Simple shapes and basic stitches can be combined to create the elephant, and many patterns include helpful tutorials and step-by-step instructions.
How long does it take to crochet an elephant?
The time it takes to crochet an elephant depends on your skill level and the complexity of the pattern. On average, it can take anywhere from a few hours to a couple of days to complete the project.
What kind of yarn is best for crocheting an elephant?
Medium-weight (worsted) acrylic yarn is a popular choice for crocheting elephants due to its durability and ease of care. You can also use cotton yarn for a softer finish, but it may be less flexible.
Can I customize the size of my crocheted elephant?
Yes! You can customize the size of your crocheted elephant by adjusting the yarn weight and hook size, or by following a pattern designed specifically for larger or smaller elephants.
Where can I find crochet elephant patterns?
Crochet elephant patterns can be found in craft books, online pattern marketplaces, and free crochet websites. Many crochet blogs also offer unique and creative patterns for elephants.


