
crochet elephant pattern
Creating a crochet elephant pattern is not just about making an adorable stuffed animal.
It’s about the joy and creativity you unleash with every stitch.
If you’ve ever marveled at those cute little elephants, you’ll love how easy they are to crochet!
As you embark on this delightful project, you’ll find that using basic crochet stitches like single crochet, double crochet, and slip stitches will make the process smooth and enjoyable.
Now, don’t worry if you’re new to this; we’ve got you covered with a crochet stitches guide that breaks everything down for you.
Plus, understanding different crochet stitch patterns can elevate your skills as you progress.
Whether you want to create a playful baby gift or a charming decor piece, you’ll find that crocheting an elephant is a wonderfully rewarding experience.
So grab your yarn and hook, and let’s get started on this fun adventure!
“`html
“`
1. Overview of Crochet Elephant Patterns
Crochet elephant patterns have gained immense popularity among crafters due to their adorable designs and versatility.
These patterns offer a delightful way to express creativity while producing charming decorative items or gifts suitable for all ages.
They can range from simple, beginner-friendly designs to more intricate, advanced patterns that challenge seasoned crocheters.
Crocheting an elephant can serve various purposes, including making toys for children, decorative pieces for the home, or personalized gifts.
Crafting a crochet elephant typically involves creating three main components: the body, the head, and the legs.
Each of these components requires attention to detail, ensuring the final product closely resembles the intended design.
In addition, crochet elephants can be adapted into various themes and styles.
For example, they can be made in a rainbow of colors to suit different tastes or designed with unique patterns or textures to stand out.
When choosing a crochet elephant pattern, it is essential to consider the skill level required, the estimated time for completion, and the intended use of the finished piece.
Typically, patterns are available in both written and video formats, catering to different learning preferences.
Beginners can benefit from step-by-step instructions with accompanying images, while advanced crocheters might enjoy the freedom of experimenting with their variations based on traditional patterns.
Furthermore, crochet elephant patterns can be easily personalized.
Crafters can customize features such as the size, color, and additional embellishments, fostering creativity and allowing for a unique touch in every project.
This aspect makes crochet elephants a favorite among many, as each creation tells a different story through its craftsmanship.
Overall, the world of crochet elephant patterns invites both novices and experts into a charming realm where imagination meets craftsmanship.
Materials Needed for Crochet Elephant
To create a charming crochet elephant, gathering the right materials is essential.
The following list outlines the basic supplies you’ll need:
- Yarn: A soft, durable yarn in your desired color(s) for the elephant’s body.
- Crochet Hook: A hook that matches the size recommended for your yarn (usually indicated on the yarn label).
- Scissors: For cutting your yarn at the end of your project.
- Tapestry Needle: This is used for weaving in the ends of your yarn and for sewing pieces together.
- Stuffing: Polyester fiberfill or similar material to give your elephant a cuddly shape.
- Stitch Markers: Used to keep track of rounds or stitches in your work.
- Optional Accessories: Safety eyes, embroidery thread for facial features, or additional embellishments.
Choosing the Right Yarn
When selecting yarn, consider the following factors:
- Weight: For an elephant, medium-weight yarn (worsted weight) is commonly recommended.
- Material: Acrylic or cotton yarn is popular due to its softness and durability.
- Color: Choose colors that fit your vision, from realistic grays to vibrant pastels.
Tools Overview
Each tool you use contributes to the final product.
For example:
| Tool | Purpose | |||||||||||||
|---|---|---|---|---|---|---|---|---|---|---|---|---|---|---|
| Crochet Hook | Creates stitches and shapes your yarn into the elephant’s body. | |||||||||||||
| Tapestry Needle |
| Part | Suggested Size |
|---|---|
| Head Diameter | 4-5 inches |
| Trunk Length | 3-4 inches |
Always remember to check your gauge and adjust your hook size or tension as necessary.
Once completed, the head and trunk can be attached to the body securely, ensuring that your elephant retains its shape and charm.
This step is both fun and rewarding as you see features come together in your crocheted creation!
Adding Legs and Tail to Your Crochet Elephant
To complete your crochet elephant, adding legs and a tail is essential for achieving its adorable and recognizable shape.
Creating the Legs
Typically, elephants have four legs that are sturdy enough to support their bodies.
Here’s a simple approach to crocheting the legs:
- Start by crocheting in rounds, beginning with a magic ring.
- Use single crochet stitches to build the leg’s foundation.
- Increase evenly as you work up to create a cylindrical shape.
The legs can be made slightly thicker at the base to mimic the structure of an actual elephant’s legs.
Connecting the Legs
Once you complete each leg, make sure to:
- Securely attach them to the body using a yarn needle.
- Position the legs evenly for balance, ensuring the elephant stands upright.
- Use slip stitches to seamlessly join the legs, minimizing visible seams.
You can place the legs about a few rounds above the body’s base to give your elephant a more proportionate and realistic look.
Crafting the Tail
The tail is a small but significant feature that adds charm to your crochet elephant.
To make the tail:
- Chain a length of approximately 10-15 stitches for a thin tail.
- Single crochet back into the chain to add some width.
- Fasten off, leaving a long tail for sewing.
Attach the tail to the back of the body, ensuring it’s centered for balance.
This small detail can be braided or made fluffier by adding additional yarn strands for texture.
Incorporating the legs and tail with care will enhance your elephant’s overall appearance, making it both adorable and sturdy.
Embellishments: Eyes, Ears, and Other Features
Adding embellishments to your crochet elephant can elevate its charm and personality significantly. This is the fun part of the project where you can unleash your creativity and make your elephant unique. The following sections will guide you through various embellishments you can incorporate.
Eyes
The eyes of your crochet elephant play a crucial role in expressing its character. You have several options for eyes:
- Safety Eyes: These are plastic, round eyes that snap into place. They are perfect for stuffed animals since they are child-safe.
- Embroidery: For a softer look, you can use embroidery thread to stitch simple black dots or more complex shapes like eyelids.
- Beads: Adding beads can sparkle and shine, making the eyes stand out even more.
Ears
The ears of your crochet elephant can be designed in various styles to enhance its cuteness. Here are some ideas:
- Floppy Ears: To create floppy ears, crochet large circles and attach them using a slip stitch.
- Pointy Ears: For a more whimsical look, pattern your ears in a pointed fashion by decreasing stitches at the top.
- Layered Ears: Combine two different yarn colors for a layered effect. Crochet one ear in a smaller size and sew it to the middle of a larger ear.
Nose and Mouth
The trunk and mouth embellishments can be crafted to enhance the elephant’s expression:
- Stitched Nose: Create a simple, small triangle and sew it onto the trunk for a cute button nose.
- Hooked Mouth: Use a simple chain stitch to form a smiling mouth.
Accessories
Don’t forget about accessories that can add a special touch to your crochet elephant:
- Scarves: Crochet a tiny scarf or a bow tie using a contrasting color of yarn.
- Hats:Variations of Crochet Elephant Patterns

Crochet elephant patterns are incredibly versatile, allowing for numerous creative variations that cater to different preferences and skill levels.
Types of Elephants
Some popular variations include:
- Baby Elephants: Smaller and cuter, often designed for children’s toys.
- Amigurumi Elephants: These are tightly stitched for a more rounded, plush look, perfect for collectibles.
- Realistic Elephants: Patterns focusing on intricate details such as texture and anatomical accuracy.
Different Styles and Techniques
Crochet enthusiasts can also experiment with techniques that enhance their elephants’ designs:
- Colorwork: Use multiple yarn colors to create patterns or ombre effects.
- Textured Stitches: Incorporate bobble stitches or cluster stitches for added interest.
- Felting: After completing the elephant, wet-felting can give a unique finish.
Size Variations
Elephants can be made in various sizes from miniatures to large stuffed toys. Consider choosing patterns that explicitly mention their final dimensions for guidance.
Size Pattern Example Mini (3-5 inches) Small Amigurumi Elephant Medium (8-12 inches) Classic Toy Elephant Pattern Large (15+ inches) Big Plush Elephant Pattern Seasonal and Themed Elephants
Crafting elephants for various occasions can inspire unique designs:
- Holiday Elephants:1. Overview of Crochet Elephant Patterns
Crochet elephant patterns have become a beloved choice for crafters around the world, combining adorable designs with the joy of creating.
These patterns cater to all skill levels, from beginners to advanced crocheters, and they often come with detailed instructions that make the crafting journey enjoyable.
Whether you are looking to create a playful toy for a child, a decorative piece for your home, or a heartfelt gift, crochet elephants offer versatility in both appearance and function.
Each pattern can vary greatly in size, style, and complexity, allowing for a wide range of creative expression.
Many crochet elephant designs also incorporate various techniques, such as amigurumi, which refers to the art of knitting or crocheting small stuffed animals and anthropomorphic creatures.
This method not only adds to the charm of the elephant but also enhances the project’s depth, adding texture and life.
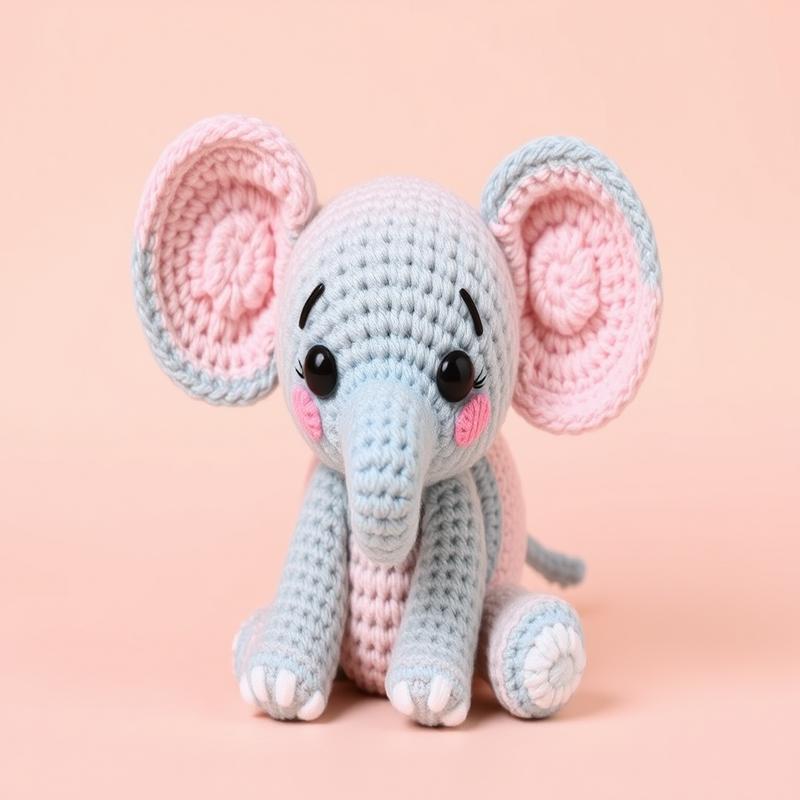
Key elements highlight the adorableness of crochet elephants, including oversized ears, long trunks, and cute little tails, which capture the essence of these magnificent animals.
Crafters can also play with color combinations and embellishments to make each elephant unique.
Moreover, crochet elephant patterns often come with additional design features, such as the ability to personalize details like colors and accessories, providing a meaningful touch to each creation.
Overall, crocheting an elephant is not just about the finished piece; it’s about the experience and creativity involved in the journey.
Embrace the many possibilities that crochet elephant patterns offer, and embark on a crafting adventure full of fun and creativity.
With every stitch, you’re not only making a delightful piece but also creating a cherished memory.
Remember, each crochet elephant can become a symbol of your unique artistic expression, making them treasured keepsakes for years to come.
conclusion
Creating your very own crochet elephant is such a rewarding experience!
Whether you’re a beginner or a seasoned crocheter, following a pattern can help you celebrate your creativity.
I hope you’ve enjoyed this journey of learning how to make a delightful crochet elephant.
If you’re looking for more inspiration, check out amazing crochet amigurumi kits to take your skills further!
Don’t forget that mastering different crochet stitches can enhance your work and make it even more fun.
Feel free to explore free crochet patterns that can expand your collection.
I’d love to hear how your elephant turned out! Please share your thoughts and photos in the comments below.
Also, connect with us on social media for more tips and inspirations!
Happy crocheting, and have fun with your projects!
“`html
Frequently Asked Questions
What materials do I need for the crochet elephant pattern?
You’ll need yarn (preferably cotton for durability), a crochet hook (typically size G or H), stuffing, and safety eyes or thread for the eyes. You may also want a yarn needle for weaving in ends.
Is this pattern suitable for beginners?
Yes, the crochet elephant pattern is beginner-friendly! It includes step-by-step instructions and basic stitches to help you learn as you go.
How long does it take to crochet an elephant?
Depending on your skill level and how much time you dedicate to the project, it can take anywhere from a few hours to a couple of days to complete.
Can I customize the elephant’s colors?
Absolutely! You can choose any colors you like for your elephant, making it uniquely yours. Feel free to get creative with yarn colors!
What skill level is required for this pattern?
This pattern is designed for all skill levels but is especially accessible to beginners. Basic knowledge of crochet stitches is recommended.
Are there any video tutorials available for this pattern?
Yes, many crochet enthusiasts share video tutorials for similar patterns on platforms like YouTube. Look for tutorials that match your chosen pattern.
Can I sell products made from this pattern?
Typically, yes! However, it’s important to check the specific terms of use associated with the pattern you are following to ensure compliance.
What if I get stuck while crocheting?
If you encounter any challenges, consider
Similar Posts

crochet ear warmer
Create cozy and stylish crochet ear warmers with our step-by-step guide. Discover easy patterns and techniques to keep warm this winter. Get started today!
crochet edging
Discover the art of crochet edging with this comprehensive guide. Learn various techniques, tips, and patterns to enhance your projects. Start creating beautiful edges today!
amigurumi crochet
Discover the art of amigurumi crochet with our comprehensive guide. Learn techniques, find patterns, and create adorable plush toys. Start crafting today!
crochet blanket
Explore the world of crochet blankets with our detailed guide. Discover easy patterns and techniques to create your own cozy masterpiece. Get started today!
slip stitch crochet
Discover the art of slip stitch crochet with our step-by-step guide. Learn techniques and tips to create beautiful projects effortlessly. Start crafting today!
how to slip stitch crochet
Master the art of slip stitch crochet with this easy-to-follow guide. Discover techniques and tips that will enhance your skills and inspire your projects.


