
ripple stitch crochet
Ripple stitch crochet is a beautiful technique that adds a wavy texture to your projects. It’s perfect for creating cozy blankets, stylish scarves, or even delicate table runners. I’ve always loved the way ripple patterns bring a unique flair to crochet work. If you’re curious about the intricacies of this stitch, check out what is considered the prettiest crochet stitch here.
This stitch creates a rhythmic pattern that can be surprisingly simple once you get the hang of it. If you’re a beginner, don’t worry; you’ll find it’s easier than it looks! You might want to familiarize yourself with basic crochet stitches before diving in. I often encourage people to explore different crochet stitches to elevate their skills, and I think ripple stitch is a fantastic choice from different options out there.
Ready to get started? Let me guide you through some fun crochet stitch patterns that incorporate the ripple stitch. Together, we can create stunning pieces that will impress everyone!
“`html
“`
1. What is Ripple Stitch Crochet?
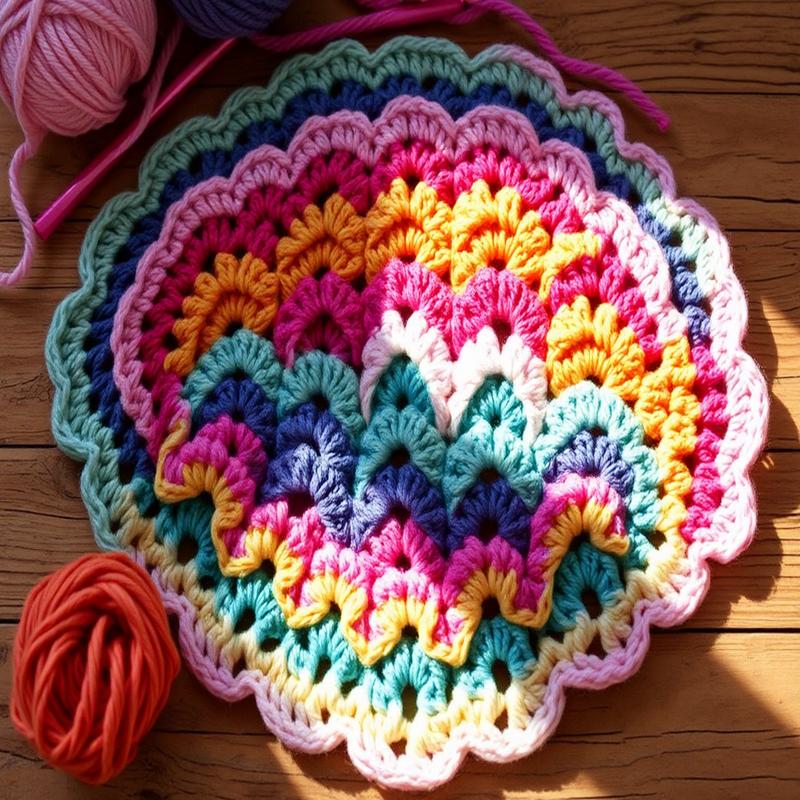
Ripple stitch crochet is a highly popular and visually striking technique used to create patterns that resemble waves or ripples in fabric.
This method is characterized by a series of peaks and valleys, resulting in a textured surface that adds dimension to various projects.
Typically involving a combination of double crochet and chain stitches, ripple stitch crochet allows for endless creativity and customization.
The basic structure of ripple stitch crochet begins with chaining a foundation row, followed by a sequence of stitches designed to create the wave-like effect.
As the work progresses, stitches are strategically increased and decreased to form the points of the ripples, resulting in a rhythmic and engaging pattern.
Ripple stitch can be applied to an array of crochet items, including blankets, scarves, and even clothing, making it a versatile choice for crafters of all skill levels.
Key Characteristics of Ripple Stitch Crochet
- Textured appearance: The alternating highs and lows create an eye-catching design.
- Versatility: Can be used for various projects, from home décor to apparel.
- Adaptable: Patterns can be modified in color and scale to suit individual preferences.
One of the reasons ripple stitch crochet is favored by many is its potential for creativity.
Crafters can experiment with color combinations and yarn types to enhance the visual appeal of their projects.
A ripple afghan, for instance, can transition through a gradient of colors, producing a stunning effect that captivates onlookers.
In essence, ripple stitch crochet is a joyful and rewarding technique that combines artistry and functionality, allowing crocheters to produce both beautiful and functional creations.
For those looking to delve into this captivating stitch, understanding its foundation and application is the first step towards mastering this timeless crochet technique.
History of Ripple Stitch Crochet
The ripple stitch is a timeless crochet technique that has captivated crafters for generations. Its origins can be traced back to the early 19th century, when crochet began to evolve in Europe, particularly in countries like Ireland and France.
Initially, crochet was used as a decorative edging for garments and household linens. Through the years, the use of crochet expanded, and the ripple stitch emerged as a popular pattern for blankets, shawls, and garments.
Key Historical Developments
- 19th Century: The ripple stitch found its place in early crochet patterns, often used in lacework.
- 1920s: The pattern gained attention through publications showcasing home crafts, contributing to the boom in crochet popularity during this era.
- 1970s: The ripple stitch saw a resurgence in the craft movement, emphasizing its versatility and ability to add texture.
As the art of crochet evolved, the ripple stitch was adapted and developed into various forms, allowing for an incredible variety of designs and techniques.
One of the most notable aspects of ripple stitch crochet is its adaptability to different yarns and colors, making it a favorite among many crocheters.
This stitch is often marked by its characteristic undulating wave patterns, which can create stunning visual effects in any project.
“The ripple stitch is not just a pattern; it’s a creative expression that transcends time.”
Today, the ripple stitch continues to be embraced by both beginners and experienced crocheters, with countless patterns available in books, online, and in artisan markets.
Its rich history reflects a profound cultural significance in the crafting community and serves as a beautiful reminder of the enduring love for handmade textiles.
Benefits of Using Ripple Stitch in Projects
Ripple stitch crochet offers a unique blend of aesthetic appeal, texture, and versatility, making it an ideal choice for various projects.
One of the most notable benefits of ripple stitch is its visual impact.
The undulating waves created by this stitch create a dynamic look that can transform ordinary pieces into captivating works of art.
Whether used in blankets, shawls, or garments, the ripple stitch adds an eye-catching element to any project.
Additionally, ripple stitch is highly versatile.
It can be adjusted to create different sizes and shapes, making it suitable for both small and larger projects.
This flexibility allows crafters to customize their work to meet specific design needs, enhancing its functionality.
Another significant advantage is the texture that ripple stitch produces.
The raised ridges create a tactile experience that is inviting and cozy.
When used in blankets or wearables, this texture can provide additional warmth and comfort.
Furthermore, ripple stitch crochet is efficient in yarn usage.
Large projects can be completed without expending a vast amount of yarn.
This can be particularly beneficial for those working from limited supplies, as certain patterns allow for stunning creations while maximizing material utilization.
Crafters can also enjoy the rhythmic quality of creating ripple stitches.
The repetitive nature of the stitch can be meditative, promoting relaxation and focus.
Many crocheters find comfort in the engaging process, allowing for hours of enjoyable crafting.
Overall, ripple stitch crochet combines beauty, adaptability, and a satisfying crafting experience.
With many free patterns available, including options at Love Crafts, there’s no shortage of inspiration to get started on your projects using this delightful stitch.
To explore more about various crochet stitches, visit the Crochet Stitches Guide for a comprehensive overview of techniques and styles that can further enhance your crochet repertoire.
Essential Tools and Materials for Ripple Stitch Crochet
To successfully create ripple stitch crochet projects, having the right tools and materials is crucial.
The essentials can be categorized into several key components, each playing a pivotal role in achieving the desired outcome.
Essential Tools
- Crochet Hooks: Choose a size that matches your yarn. Common sizes range from G (4.0 mm) to J (6.0 mm) for ripple stitches.
- Tapestry Needles: These are necessary for weaving in ends after finishing your project, ensuring a neat appearance.
- Scissors: A good pair of sharp scissors will make it easy to cut your yarn cleanly.
Materials Needed
When selecting materials, consider the following factors:
- Yarn: This is the most critical material. Acrylic, cotton, or wool are common choices. The weight of the yarn affects the drape and texture of your ripples.
- Color Palette: Ripple stitch designs often utilize multiple colors. Choose colors that complement each other for a vibrant effect.
- Stitch Markers: Helpful for keeping track of your pattern repeats, especially in larger projects.
Choosing the Right Yarn
Selecting the right yarn can make a significant difference in the final product. Here are a few tips for choosing yarn:
- Texture: Smooth yarns work well for beginners, while textured yarns can provide unique aesthetics.
- Durability: Consider the use of the finished product. For items like blankets, choose durable yarns that can withstand wear and tear.
- Washing Instructions: If your project requires frequent washing, opt for machine-friendly yarn.
In summary, being equipped with the right tools and selecting quality materials sets the foundation for successful ripple stitch crochet projects.
5. Basic Techniques for Mastering Ripple Stitch
Mastering ripple stitch crochet involves understanding a few essential techniques that form the backbone of creating beautiful ripple patterns.
Foundation Chain
The ripple effect begins with a solid foundation.
Begin by making a foundation chain that is a multiple of the required stitch count plus additional stitches needed for turning.
For example, if your pattern calls for repeating a sequence of 6 stitches, start with a chain length of at least 6n + 2, where n is any non-negative integer.
This extra two chains ensures room for the first double crochet in the first ripple.
Stitch Techniques
Ripple stitch commonly utilizes several basic crochet stitches, including:
- Double crochet (dc)
- Single crochet (sc)
- Chain stitches (ch)
These stitches are foundational to creating the peaks and valleys of the ripple pattern.
Shaping the Ripples
To shape the ripples, you will typically alternate groups of double crochets followed by single crochets in each row.
The magic happens when you work two double crochets in one stitch, which forms the peaks, while single crochets in between create the valleys.
The consistent alternation is crucial for achieving the signature wavy look.
Color Changes
Utilizing color changes can enhance the beauty of your ripples.
When changing colors, do it at the end of a row to create a clean transition.
This technique allows for unique designs and can highlight the ripple effect.
Consistent Tension
Keeping consistent tension throughout is vital.
Inconsistent tension can result in uneven ripples, making the project look amateurish.
Practice maintaining the same tension to ensure your work flows smoothly and remains uniform.
By honing these techniques, you will find that creating stunning ripple patterns becomes an enjoyable venture in your crochet journey.
Common Patterns and Designs for Ripple Stitch Crochet
Ripple stitch crochet is renowned for its dynamic and visually striking patterns.
These patterns create an undulating wave effect that adds texture and depth to various projects.
Classic Ripple Pattern
The classic ripple pattern is the foundation of ripple stitch crochet.
It typically uses double crochet stitches and chain stitches to create a series of peaks and valleys.
This pattern can be adapted easily in size or color:
- Start with a foundation chain in a multiple of stitches, typically 12 to 18 stitches.
- Use a combination of triples, doubles, and singles to form the waves.
- Add colors to each peak for a vibrant effect.
Chevron Pattern
The chevron pattern is another popular choice that resembles a zigzag design.
This pattern works well for scarves and blankets and allows for greater customization.
The construction is similar to the classic ripple but incorporates more angular peaks.
It can be completed with solid or variegated yarns.
Shell Ripple Pattern
The shell ripple pattern provides a more delicate texture that can be adapted for elegant projects.
These stitches often include shell stitches at the peaks:
- Use five double crochets to create a shell at the top of each peak.
- Alternate with single or half-double crochet stitches in the valley increases.
Granny Ripple
The granny ripple is a variation that combines the traditional granny square with the ripple technique.
This blend creates a unique, eye-catching piece.
These common patterns provide a variety of options for creating stunning ripple stitch crochet projects.
Experimentation with stitches, colors, and fibers can produce a vast array of unique designs.
Tips and Tricks for Perfecting Ripple Stitch Crochet
Perfecting the ripple stitch in crochet requires practice, patience, and awareness of a few techniques that can enhance your work. Here are several tips and tricks that can help you achieve beautiful and consistent ripple designs.
1. Choose the Right Yarn
The yarn you select can significantly affect the appearance of your ripple stitches.
- Opt for a smooth yarn that glides easily across your hook.
- Avoid yarns with a lot of texture, as this can obscure the definition of your stitches.
- A medium-weight yarn will provide a nice balance for ripple patterns.
2. Maintain Consistent Tension
One of the keys to achieving even ripples is maintaining consistent tension throughout your work.
- Be mindful of how tightly or loosely you hold your yarn.
- Consider using a tension gauge or a stitch marker to monitor your stitches.
- Practice will naturally improve your tension over time.
3. Row Count Awareness
Keep track of your row counts, as ripples require a consistent rhythm.
- Utilize a notebook or crochet app to log each row as you complete it.
- Mark each row with a stitch marker if needed.
4. Block Your Finished Project
Blocking is an essential step that can help shape and define your finished ripple pattern.
- Use wet blocking for yarns that can tolerate moisture.
- Pin your work into place to enhance the wave-like repetition.
5. Test Swatches
Before diving into a full project, create a test swatch to establish the right stitch count and ripple heights.
- This will help you determine how many stitches you need for your desired width.
- Adjust your hook size based on the tightness or looseness of your results.
By following these tips and incorporating them into your crochet practice, you’ll be well on your way to mastering the ripple stitch technique and creating stunning crochet projects.
Creative Applications of Ripple Stitch Crochet
Ripple stitch crochet is a versatile technique that can be applied creatively across various projects, allowing crafters to explore their artistic boundaries.
One of the most popular applications of ripple stitch is in the creation of blankets and throws.
Using this stitch, crafters can create visually stunning patterns that provide depth and texture to larger pieces.
Popular Projects Using Ripple Stitch:
- Afghans and blankets: Perfect for adding warmth and style to any living space.
- Shawls and wraps: Can be used to create lightweight and elegant accessories.
- Baby blankets: Ripple stitch designs are ideal for soft, comforting baby projects.
- Home décor items: Cushions and wall hangings can benefit from eye-catching ripple patterns.
In addition to functional items, ripple stitch crochet is also commonly used in fashion accessories.
Hats, scarves, and bags can be enhanced with this stitch, providing a unique texture and eye-catching design.
Creative Fashion Accessories:
- Hats: A ripple beanie makes a trendy winter accessory.
- Scarves: Wrap yourself in a delightful, textured scarf.
- Bags: A crochet ripple bag can be both stylish and practical.
Beyond traditional items, ripple stitch can also be a fantastic way to personalize gifts.
Using different color combinations, crafters can tailor projects to the recipient’s taste, making it a heartfelt choice.
Ripple stitch can also be applied to unique installations like wall art.
With careful planning, crafters can create striking pieces that celebrate the beauty of rounded shapes and varied colors.
Additionally, combining ripple stitch with other crochet techniques can lead to innovative projects.
Experimenting with various yarn weights, hook sizes, and colors can yield unexpected and delightful results that stand out.
Overall, the creative applications of ripple stitch crochet are vast, inspiring crafters to explore and innovate in their designs.
Troubleshooting Common Issues with Ripple Stitch
Ripple stitch crochet, while beautiful and versatile, can sometimes present challenges to even experienced crocheters.
Understanding and addressing these common issues can help ensure that your projects turn out as intended.
1. Uneven Ripples
Uneven ripples are one of the most frequently encountered problems.
This can result from inconsistent tension or incorrect stitch count.
To address this issue:
- Check your tension regularly while crocheting.
- Count your stitches after completing a few rows to ensure you have the correct number.
- Practice maintaining the same stitch size, especially when changing yarn types.
2. Ripple Stitch Curling
Often, the edges of your ripples may curl inwards, which can create an unappealing look.
To prevent curling:
- Consider incorporating a border on the edges.
- Use a slightly larger hook size to give your stitches more room.
- Blocking your finished piece can help flatten curled edges.
3. Gaps Between Stitches
Gaps can occur between ripples, especially when working with larger hooks.
To minimize gaps:
- Be mindful of your yarn over size when making double crochets.
- Experiment with the number of stitches pulled in between ripples for tighter builds.
4. Yarn Choice
Sometimes the yarn you choose may not suit ripple stitches.
To make the right choice:
Select yarns with good elasticity and drape, avoiding overly thick or thin yarns.
Each of these troubleshooting techniques requires practice and patience.
By staying consistent and observant, you’ll enhance the quality of your ripple stitch projects significantly.
Remember, every crocheter has their own learning curve, and perfecting ripple stitch crochet comes with time.
“Mistakes are proof that you are trying.”
1. What is Ripple Stitch Crochet?
Ripple stitch crochet is a distinctive and visually striking technique that creates a wave-like pattern in yarn projects.
This stitch is characterized by its unique peaks and valleys, which add dynamic texture and movement to blankets, shawls, and other crochet items.
Typically, ripple stitch patterns are achieved through a combination of chains, double crochets, and increases and decreases.
The result is a flexible fabric that drapes beautifully, making it a favorite choice among crocheters.
2. History of Ripple Stitch Crochet
The ripple stitch has a rich history that dates back to the early 20th century.
Its origins can be traced through various cultures that have incorporated wave patterns into textiles.
Initially popularized in the 1960s and 1970s, ripple stitch crochet became a staple in home decor items, especially in afghans.
Over the decades, the design has evolved, influenced by modern crochet trends and innovations.
Today, it remains a beloved technique within the crafting community, celebrated for its versatility and charm.
3. Benefits of Using Ripple Stitch in Projects
Ripple stitch crochet is not only aesthetically pleasing but also offers several practical benefits.
- Visual Interest: Its unique pattern adds a pop of texture to any project.
- Versatile Designs: Works wonderfully in various projects like blankets, scarves, and garments.
- Easy to Learn: Once familiar with the basic techniques, crocheters can easily create complex patterns.
- Dynamic Fabric: The structure allows for flexibility while still maintaining shape.
These advantages make ripple stitch an excellent choice for both beginners and experienced crocheters looking to experiment with new designs.
4. Essential Tools and Materials for Ripple Stitch Crochet
To successfully create ripple stitch crochet projects, you’ll need some essential tools and materials.
| Tool/Material | Description |
|---|---|
| Yarn | Choose a yarn weight based on your project. Acrylics are great for beginners. |
CrochetConclusionCrocheting with the ripple stitch can be such a rewarding experience! It’s a fantastic way to add texture and charm to your projects. Whether you’re creating a cozy blanket or a lovely scarf, the ripple stitch brings a unique flair that’s hard to resist. If you’re just starting out, I recommend checking out this beginner’s guide to get a solid foundation. You can also dive into some beginner stitches like single crochet to boost your skills. Feeling adventurous? Explore 50 beautiful crochet stitches that can elevate your projects! Don’t forget to snag some free crochet patterns to get started right away. And if you’re curious about yarn-saving techniques, check this out! I’d love to hear about your experiences with ripple stitch! Feel free to share your thoughts in the comments below and follow us on social media for more crochet fun. “`html Frequently Asked QuestionsWhat is ripple stitch crochet?Ripple stitch crochet is a pattern technique that creates a wavy, undulating texture in finished projects. It typically involves alternating between increases and decreases to form the distinctive ripple shape. How do I start a ripple stitch crochet project?To start a ripple stitch project, you need to chain a multiple of the stitch count indicated in your pattern plus additional chains for the foundation. Follow the specific instructions for the first row to establish the ripple design. What types of yarn are best for ripple stitch crochet?Any yarn can work for ripple stitch crochet, but medium weight (worsted) yarn is commonly used for beginners. Choose yarn based on the desired drape and texture of your finished piece. Can I use ripple stitch in any crochet project?Yes! Ripple stitch can be applied to various projects including blankets, shawls, and garments. Just make sure to adjust the pattern size and stitch count as needed. What stitches are commonly used in ripple crochet patterns?Ripple crochet patterns often incorporate double crochet stitches, but variations can include half-double crochets or treble crochets to achieve different effects. Is ripple stitch crochet suitable for beginners?Yes, ripple stitch crochet is beginner-friendly! While it may involve some basic increases and decreases, clear patterns make it easy to follow along. How can I fix mistakes in my ripple stitch crochet?To fix mistakes in ripple stitch crochet, you can carefully frog (unravel) rows back to the point of error or use a yarn needle to weave in corrections without unraveling the entire Similar Posts how to crochet a scarf“Discover how to crochet a cozy scarf with our easy step-by-step guide for beginners. Learn essential techniques and start crafting your own stylish accessory today!” chevron crochet stitchDiscover the chevron crochet stitch with our easy-to-follow tutorial. Learn the techniques and tips you need to create beautiful patterns. Get started now!  crochet groups near meFind local crochet groups to share ideas, learn new techniques, and connect with fellow enthusiasts. Discover where you can start crafting today!  amigurumi crochetDiscover the art of amigurumi crochet with our comprehensive guide. Learn techniques, find patterns, and create adorable plush toys. Start crafting today!  How to Create a Beautiful Shell Stitch Crochet ScarfCreate a beautiful shell stitch crochet scarf with our easy step-by-step guide. Perfect for beginners, this project will enhance your skills and style. Get started now!  crochet animals for beginnersDiscover simple and fun crochet animal patterns perfect for beginners. Start your creative journey today with easy-to-follow instructions and tips! |